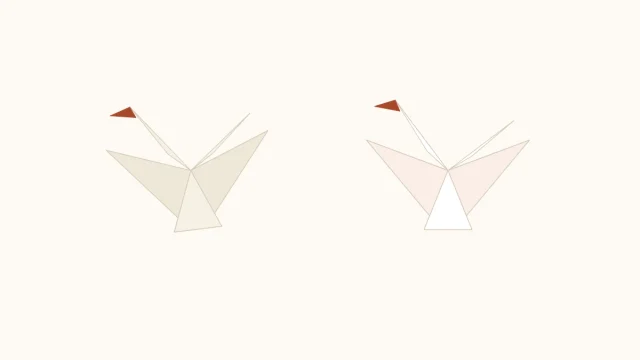
Basic Origami Folds: Valley, Mountain, Pleat, and Reverse Folds
A handful of folds explain almost everything that shows up in origami diagrams. Here they are one at a time, with the hand movement, the expected result, and the mistake each one tends to cause.
Tutorial at a glance
Materials
- Square sheets of scrap paper
- A hard, smooth surface
Origami diagrams look complicated until you notice how few moves they actually use. The basic origami folds number fewer than ten, and nearly every other name you run into in books is a combination or a variation of them.
Each one is worth practicing on its own, on scrap paper, before you meet it inside a model. A fold you learned out of context is much easier to recognize later.
Valley and Mountain: The Two Fundamental Folds
Every model comes down to these two, and they are the same fold seen from opposite sides.
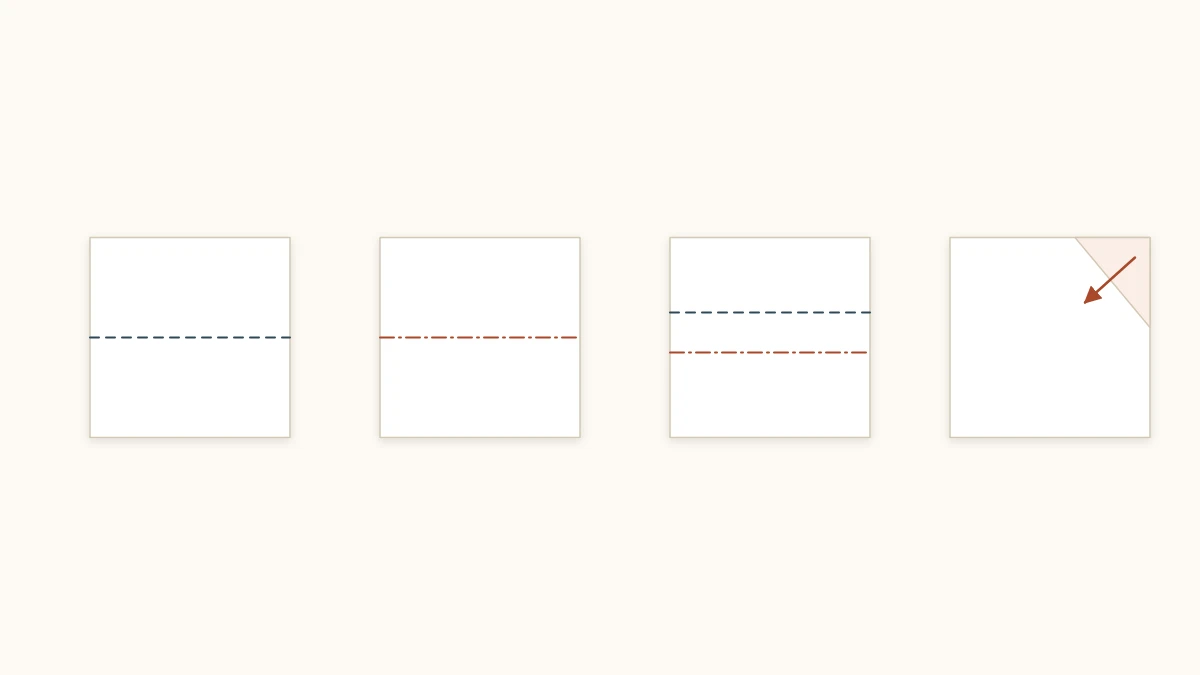
In a valley fold, the paper dips: you bring one edge over and toward the other, and the crease sits at the bottom, like a gutter. In a mountain fold, the paper rises: the edge goes behind, and the crease sits on top, like a ridge.
Make a valley fold, flip the sheet over, and you are looking at a mountain fold. That is why many diagrams take a shortcut: instead of asking for a mountain fold, they tell you to turn the paper over and make a valley fold, which is more comfortable to do.
| Fold | Line in the diagram | Where the paper goes |
|---|---|---|
| Valley | Dashed | Forward, toward you |
| Mountain | Dash-dot | Backward, away from you |
Matching each line to its movement is the first thing to memorize if you want to read origami diagrams without leaning on video.
Where It Usually Goes Wrong
The classic mistake is not mixing the two up. It is pressing before aligning. A crease cannot be taken back: once it is set, it becomes the reference for everything that follows. Position the corners, check them from above, hold the paper with one hand, and only then run a fingernail along the fold, always from the center outward.
Pleat Fold: Two Folds Working Together
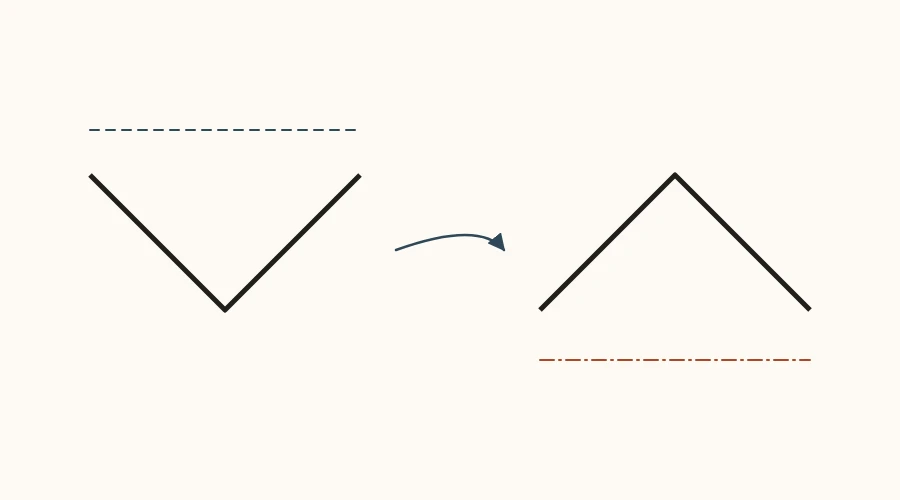
A pleat is a valley fold followed by a mountain fold (or the reverse), which leaves a step in the paper. It is what makes the accordion legs on a jumping frog, the tiered branches of a tree, and the brim of a hat.
To make one:
- Crease the valley fold first, where the diagram shows it.
- Crease the mountain fold parallel to the first, a shorter distance away.
- Push both at once and let the step form by itself.
When several pleats come in a row, the spacing between them has to stay constant. That is what gives an even accordion. Creasing them one at a time and checking the width is slower, and the result is far better than trying to fold four at once.
Squash Fold: Open a Layer and Flatten It
You lift a flap, open the pocket inside it, and press down so the flap spreads symmetrically over the paper.
The move shows up early: it is what turns the hat shape into a diamond when you fold a paper boat, and what opens the flaps of the preliminary base.
The trick is to crease the center line of the flap before you open it. Without that crease, the flap spreads crooked and the result is lopsided, and the lopsidedness carries through the rest of the model.
Inside Reverse Fold: The Point That Tucks In
This is the fold behind the neck of the crane (tsuru), the tail of a whale, and the beak of just about any paper bird. The point is not simply folded over. It is turned inside out between the layers, switching sides.
- Crease the fold at the angle you want as a valley fold, pressing firmly.
- Unfold and crease the same line as a mountain fold, in the same place.
- Open the layers of the point slightly, the way you would open a book.
- Push the point inward, letting it drop between the layers, and close the paper over it.
Watch out
Skipping steps 1 and 2 is a leading cause of torn paper in origami. Without a crease prepared in both directions, the top layer has nowhere to give and splits at the base of the point.
Outside Reverse Fold: The Point That Wraps Around
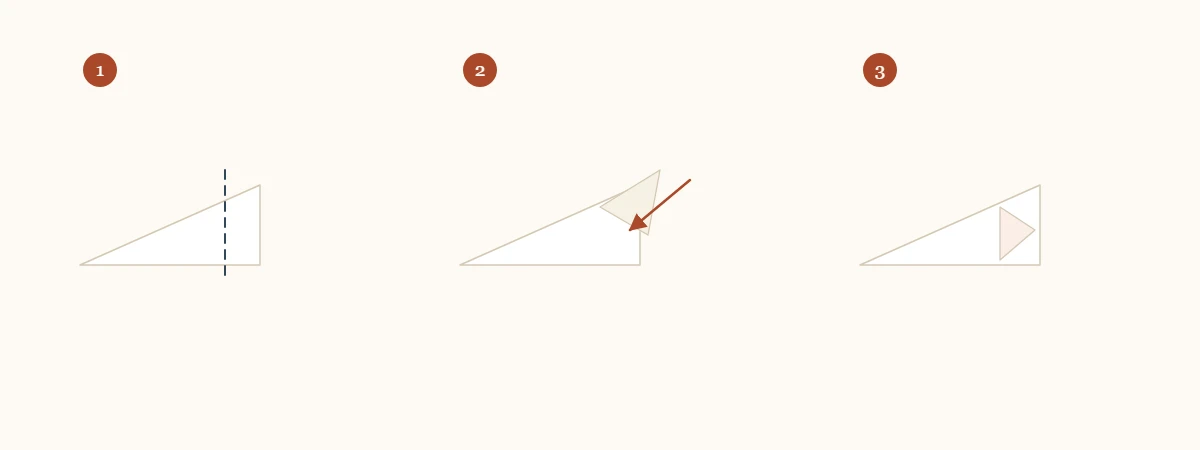
Same logic, opposite motion: instead of tucking in, the point wraps around the outside of the layers, like a collar. It forms the head of the crane once the neck is in place, and it makes ears and snouts on many animal models.
The preparation is identical, with the crease set in both directions. When you make the fold, you open the point and pull it up and outward, letting it wrap around the body of the model. If the point resists, the mountain crease almost always was not pressed firmly enough.
Petal Fold: The Fussiest of the Essentials
A petal fold raises a narrow point while two sides fold inward at the same time. It is the step that turns the preliminary base into the bird base, which also makes it the spot where the origami crane tends to stall.
The sequence, with the open end of the paper pointing down:
- Fold the two lower edges to the center line and unfold. These creases are only guides.
- Fold the top point down along the horizontal line that connects the ends of those creases, and unfold that too.
- Lift only the front layer by its bottom point, pulling it upward.
- As the point rises, the sides close in along the creases you made. Follow them with your fingers and press once the shape lies flat.
The move seems impossible the first time and obvious the third. If the point refuses to rise, one of the guide creases is missing. Paper cannot fold where there is no crease.

Rabbit Ear: Three Creases That Meet
A rabbit ear folds two adjacent edges to the same bisector, and the leftover point stands up as a small flap. It shows up in legs, arms, and details on animal models.
In practice, you crease the two angle bisectors of the corner, pinch both at once, and let the little center flap fall to one side. It is easier to do than to describe, and the paper helps: once the three creases are there, the shape nearly closes by itself.
How to Practice Without Wasting Paper
One sheet of US Letter (8.5 x 11 in) or A4 paper cut into eight rectangles gives you eight tries at a reverse fold. There is no need for colored paper when you are drilling a movement. Printer paper already used on one side is perfect for it.
A routine that pays off: pick one fold per session, repeat it six or seven times on small pieces, and only then try it inside a model. Once the motion is automatic, a diagram stops being a puzzle and becomes a list of instructions.
If the folds are working but your models still come out crooked, the problem is probably somewhere else. The list of common origami mistakes covers the usual causes, from the work surface to the choice of paper.
Frequently asked questions
What is the difference between a valley fold and a mountain fold?
They are the same fold seen from opposite sides. In a valley fold the paper dips and the crease sits at the bottom, like a gutter; in a mountain fold the paper rises and the crease sits on top. Flip the sheet and one becomes the other. In diagrams, a valley fold is a dashed line and a mountain fold is a dash-dot line.
Why does my reverse fold always tear?
Almost always because the crease was not prepared first. A reverse fold needs the crease set in both directions, valley and mountain, before you open the paper and push the point in. Forcing the point without that pre-crease tears the top layer.