Origami Bookmark That Hugs the Corner of the Page
The corner bookmark is a triangular pocket that slips over the page. The base is the same for every variation, and it is the canvas for animals, monsters, or nothing at all.

Tutorial at a glance
Materials
- Square paper colored on one side
- Pens, if you plan to draw a face
An origami bookmark of the corner type solves a real problem: ordinary bookmarks slide around and fall out of the book. This one slips over the corner of the page, holds on by friction, and stays put even if the book gets shaken.
The structure is a triangular pocket, and it never changes. What differs from one version to the next is only what you draw or glue on top.
Step by Step
Use a 6-inch (15 cm) square for a bookmark that fits standard-size books. Paper colored on one side works well, because the inside of the pocket shows.
- Start with the colored side facing down. Fold the square along the diagonal to make a triangle, long edge at the bottom and point at the top.
- Fold the bottom left point up to the top point. Press and unfold. Repeat with the right point and unfold that too. These two creases are guides.
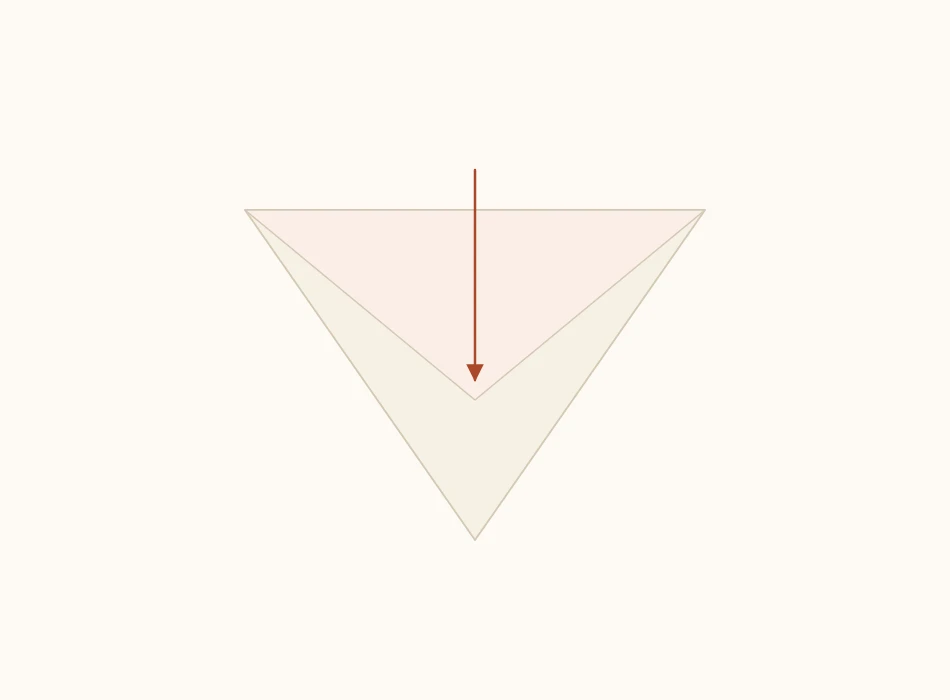
- Fold the top point down, but only the front layer, until it touches the bottom edge. The back layer stays standing.
- Fold the left point up along the crease from step 2, then tuck it into the pocket formed by the layer you folded in step 3.
- Repeat with the right point, tucking it into the same pocket.
- Test it. Open the pocket with a finger and slide it over the corner of a page.
Watch out
In step 3, fold only the front layer. If both layers come down together, no pocket forms and the bookmark has nowhere to hold the page. It is the most common mistake with this model.
Variations on the Same Base
Animal
Draw eyes on the front and add paper ears glued to the back. The dog and cat faces work well when folded from small 3-inch (7.5 cm) squares and glued onto the bookmark.
Monster
Cut triangular teeth from white paper and glue them along the edge of the pocket. With the bookmark on the page, the monster looks like it is biting the corner, which makes this the version kids tend to pick first.
Heart
Glue a small origami heart to the front. In red or pink paper it becomes a keepsake for Valentine’s Day or any other occasion.
Watermelon, Pineapple, and Others
Green paper for the base, with a red band drawn on and little black seeds, gives you a slice of watermelon. The logic is always the same: the triangular base provides the shape, and the decoration defines the character.

Sizes
| Paper | Bookmark | Good for |
|---|---|---|
| 3 x 3 in (7.5 x 7.5 cm) | about 1.5 in (4 cm) | Pocket paperbacks, planners |
| 6 x 6 in (15 x 15 cm) | about 2.75 in (7 cm) | Most books |
| 8 x 8 in (20 x 20 cm) | about 4 in (10 cm) | Large books, albums |
A bookmark that is too big covers too much text and gets in the way of reading. For most books, the 6-inch square is the right balance.
Which Paper Lasts Longest
This is an everyday model: it opens and closes, goes on and off the page, and travels inside a bag. Thin paper gets crumpled quickly.
Between 90 and 120 gsm is the ideal range: firm enough to keep the pocket open and stand up to handling, flexible enough for all five folds to close. Scrapbook paper usually works very well here.
If the paper is too thick, step 5 will not close, because the two points tucked into the same pocket add up to a lot of layers. The relationship between paper weight and number of layers is explained in the guide to the best origami paper.
Making Them in Batches
This is one of the quickest models to produce in quantity, since each one takes only a few minutes including decoration. That is why it shows up so often at birthday parties, book fairs, and classroom activities.
Splitting the work into stages goes faster: cut all the squares, fold them all, and only then decorate. A set of twenty is a comfortable project for a single sitting that way.
As a party favor, it pairs well with folded envelopes: the bookmark goes inside the envelope, with the recipient’s name written on the front.
Taking Care of the Book
A bookmark can sit against the same page for months, and that brings two risks that are easy to overlook.
Ink transfer. Water-based markers and cheap printing ink can migrate onto the book’s paper in humid conditions. For books you want to preserve, use colored pencil or permanent pen, and let it dry thoroughly before the first use.
Crease marks. Paper that is too thick strains the corner of the page and leaves a permanent fold. If the bookmark has to be pushed hard to go on, it is too tight. Remake it in lighter paper or with a slightly larger square.
Good-quality paper without excess acidity is the best choice for bookmarks meant for old books. Newspaper, because of its acidity, yellows and can stain the page over the years.
Making the Pocket Last
The wear point is always the same: the edge of the pocket, which opens and closes with every use.
There are two simple fixes. The first is to reinforce the edge with a thin line of white glue on the inside, joining the two layers that form the pocket, so it opens as a single piece. The second is to use paper colored on both sides, so wear on the outer layer does not expose a white core.
With paper between 90 and 120 gsm and a reinforced edge, a corner bookmark holds up well to long stretches of daily use.