How to Make an Origami Heart: Easy Step-by-Step Guide
A flat heart with just a few folds that glues onto a card, strings into a garland, and seals a folded note. Also shows where to write a message so it lands on the finished heart.

Tutorial at a glance
Materials
- Square paper colored on one side
An origami heart covers a lot of ground: a note, a card, a party favor, a message tucked into a lunchbox. This one is flat, which means it sticks well to surfaces, fits in an envelope, and can be written on before you fold it.
There are only a few folds and none of them needs hairline precision. What changes the result is the angle of the last two, which decides whether the lobes come out rounded or pointed.
Step by Step
- Set the square down like a diamond, with one point toward you and the colored side down. The color against the table is the one that will show on the finished heart.
- Mark the vertical axis. Fold in half by bringing the left point over to the right, press, and unfold. This crease is your guide for symmetry.
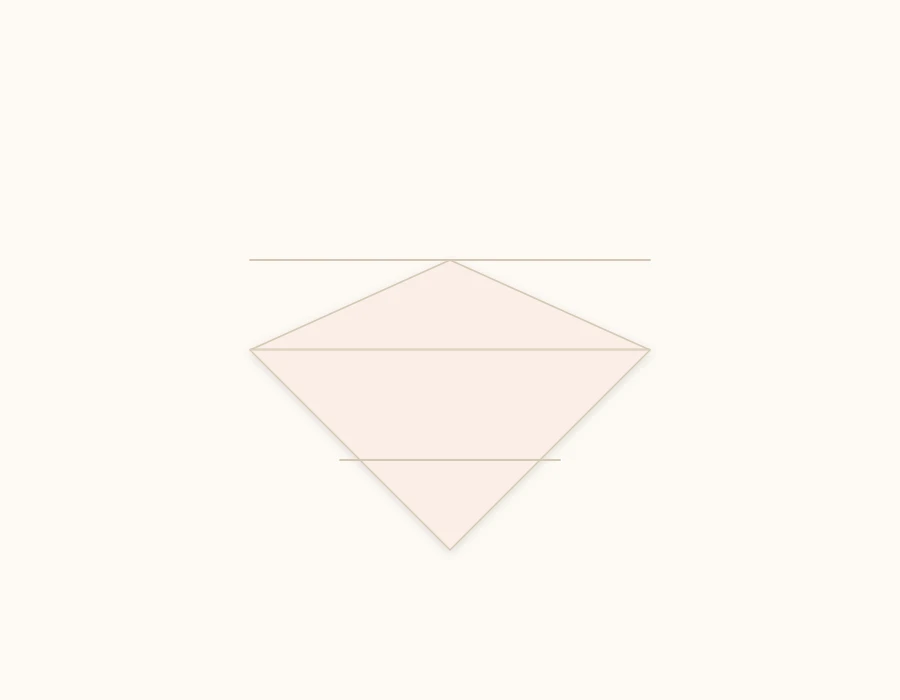
- Fold the top point down to the center of the paper. If you want an exact target, pinch a light horizontal crease first to find the middle. The top of the diamond becomes a straight, horizontal edge.
- Fold the bottom point up until it touches that straight edge. The paper now has a flat top and a flat bottom.
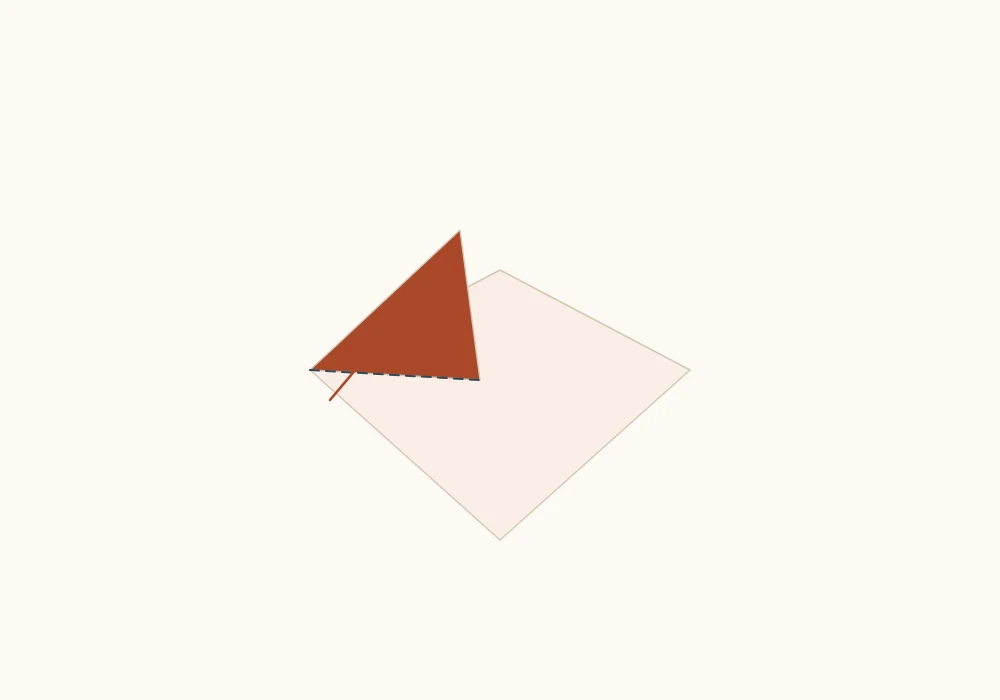
- Fold the left point up and in, so that it reaches slightly past the top edge. The fold starts near the center and runs up on a diagonal. This flap becomes one of the lobes of the heart.
- Repeat with the right point, at the same angle. Use the center crease to check that both sides are symmetrical.
- Flip the paper over. The heart appears: two lobes at the top, the dip in the middle, and the point at the bottom.
- Round it off, if you like. Fold back the corners of each lobe and the two side corners. Small folds make the heart rounder; without them it stays angular.
Tip
The angle in step 5 defines the shape. Wider folds produce broad lobes and a squat heart; tighter folds give a longer, slimmer heart. It is worth making two or three and choosing the one you prefer before folding a whole batch.
Write Before or After?
Before, and in the right spot. Because the paper gets folded over itself several times, a good part of the original surface ends up hidden on the back.
The area that stays visible is the central band of the diamond, between the center and the bottom point. Write there, with the paper open and the colored side down, and the text will show on the finished heart. For longer messages, write across the back of the whole square: the person unfolds the heart to read it, which tends to be the fun of it.
Three Ways to Use It
Seal for a Note
Fold your note, wrap a thin strip of paper around it, and glue the heart over the seam. It works as a seal and saves you an envelope.
String Garland
Small hearts, made from 3-inch (7.5 cm) squares and glued back to back over a cotton string, make a light garland. In quantity, they add up to wall decor for next to nothing, the same idea as a run of origami butterflies.
Party Favor With a Chocolate
Glue the heart to the front of a folded origami envelope with a piece of candy inside. It is one of the quickest favors to put together in bulk.
Which Paper Works Best
Paper colored on one side only is ideal here, because the model shows a single face. Colored copy paper, thin gift wrap, and kami all work well.
Avoid paper heavier than 120 gsm: the folds in step 8, which round the corners, pile up layers and the heart stops lying flat. That gets in the way precisely when the plan is to glue it to a card.
Size Variations
| Paper | Finished heart | Use |
|---|---|---|
| 3 x 3 in (7.5 x 7.5 cm) | about 1.5 in (4 cm) | Garland, confetti, pencil topper |
| 6 x 6 in (15 x 15 cm) | about 3 in (8 cm) | Card, party favor, note seal |
| 8.25 x 8.25 in (21 x 21 cm) | about 4.5 in (11 cm) | Bulletin board, door note, decor |
If you are making a lot of them, cut all the squares before you start folding. Switching between cutting and folding breaks your rhythm, and squares cut in a batch come out more uniform. The cutting method is in how to cut a perfect square from a sheet of Letter or A4 paper.
Gluing Without Ruining It
The flat heart is made to be glued down, but thin paper wrinkles quickly under liquid glue. What works:
- Thin double-sided tape, applied only to the center of the back. It is the safest option and the only one that lets you reposition.
- Glue stick, applied to the card and not to the heart. The moisture goes into the thicker surface.
- A dot of white glue the size of a pinhead, in the center. More than that soaks through the paper and marks the front.
Liquid glue spread across the whole back is the fastest route to a wavy heart: the paper absorbs it, swells, and never lies flat again.
Folding a Batch
For party favors or a whole-class activity, how you organize the work makes a big difference in how long it takes:
- Cut all the squares at once, stacked, with a craft knife and a ruler.
- Do step 3 on every square, building a pile.
- Do step 4 on every square, and so on.
Working by stage rather than by piece cuts out the time spent repositioning your hands for each fold, so a batch of fifty small hearts goes much faster this way.
If the idea is to hand out each heart with a message inside, prepare ahead: write on all the open squares, let the ink dry, and only then start folding.